Starting strawberries as bare-root plants in the winter for spring rebirth is a terrific idea. You can also postpone planting until the weather has warmed up enough to support growth in late April. A modest crop of strawberries may be planted in this strawberry planter without taking up a lot of room. Speak to your neighborhood nursery for further details on planting and cultivating strawberries, or read this fantastic article from the Seattle Times.
Step 1: Make your cuts
.png "How To Build a Strawberry Planter")
Build up your equipment and supplies. Cut your wood in line with the diagram using a circular saw or a handsaw and miter box.
Step 2: Sand each piece
.png "How To Build a Strawberry Planter")
To get rid of the particularly large splinters, you can sand the edges. this step is just there to remove some of those splintery ends, and it's totally optional.
Step 3: Assemble your base
.png "How To Build a Strawberry Planter")
Next, put the base together. Attach the 22 3/4" hemlock to the 22 7/8" board, 3/4" from the bottom. Next, put the base together. At the bottom, 3/4" from the board's edge, attach the 22 3/4" hemlock. Pre-drill the hemlock to keep it from splitting, then screw it down with 1 1/4" screws. To mark the 3/4", use the hemlock as a measuring stick. Continue to step 4 and put the four fence board pieces together into a square. After aligning the final two hemlock pieces with the other hemlock pieces inside the square, slide them inside and screw them in place.
Step 4: Pre-drill
.png "How To Build a Strawberry Planter")
For the planter's bottom, attach the four longest boards. Place the shorter boards inside the longer ones and secure with 1 1/4" screws after drilling two holes in each corner that are at least 1/2" apart from the sides of the boards. This stage will be simpler with a lengthy clamp or extra pair.
Step 5: Attach plywood base
.png "How To Build a Strawberry Planter")
The square should now be turned over, and the plywood should be placed on top of it. It is attached using glue and 1" screws.
Step 6: Drill drainage holes
.png "How To Build a Strawberry Planter")
Attach a 1/4" bit and drill a grid of drainage holes while the bottom is facing you.
Step 7: Assemble additional squares
.png "How To Build a Strawberry Planter")
The subsequent squares will be put together in the same manner as the first. Pre-drill two holes in each corner, 1/2" from the edges of the boards, then sandwich the shorter sides between the longer ones. Use screws to attach. You'll end up with five squares of various sizes.
Step 8: Prep your nails
.png "How To Build a Strawberry Planter")
Once all the squares are put together, it's time to get your nails ready. To get the nail heads off, use a pair of cutting pliers. This simple method will let you join all the parts together by converting a one-way nail into a two-way nail. A total of 16 nails will need to be filed. It will need some laborious work.
Step 9: Assemble the planter
.png "How To Build a Strawberry Planter")
Measure and mark the box's midpoints on each side, starting at the bottom. Try to align each corner of the second tier's box with the pencil mark as you place it on top of the first. Due of small variances in the wood and proportions, this is quite difficult and could not turn out exactly as you had intended. Find out how much overlap there is once everything is lined up. In order to prepare for the nail that will go there, pre-drill with a 1/16" bit in each corner.
Place the nails in each corner's pre-drilled holes, then hammer them partway down.
Step 10: Continue assembly
.png "How To Build a Strawberry Planter")
At the base of the upper box, next to the nail, apply a little bit of glue. Turn it over, then put it back on the bottom box. Use a hammer and a block of wood to press the nails in the lower tier into the surface. For the remaining three tiers, repeat steps 9 and 10.
.png "How To Build a Strawberry Planter")
Step 11: Create your irrigation system
.png "How To Build a Strawberry Planter")
The next step is to construct your sophisticated irrigation system. This will make it easier to equally water all of the strawberries across all tiers. Measure the PVC pipe's size before grabbing it. Your strawberry planter's top should be flush with it. Cut your PVC pipe to length with a handsaw.
Step 12: Make holes in your pipe
.png "How To Build a Strawberry Planter")
The holes are next. Drill holes for your irrigation system using a 1/8" drill bit. Increase the number of holes you drill at the top to let the water flow more evenly. Put gravel or tiny rocks into the pipe.
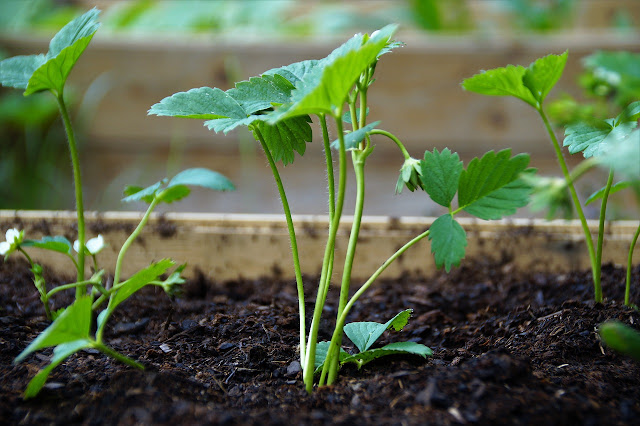
.png "How To Build a Strawberry Planter")
Your strawberries may now be planted! Put the plastic tube in the center of the planter with the open end facing up. Fill each layer with soil starting at the bottom. Then, plant your strawberries in each corner's three triangle-shaped spots. Use the PVC pipe for watering and fill the aperture with water. Your plants will be watered equally as a result.
.png "How To Build a Strawberry Planter")


.png&description=How To Build a Strawberry Planter - Gardening Tips)
Comments
Post a Comment